Role management
Role Management in SavingsNow is a mechanism used to control user permissions and access levels. Permissions are not assigned directly to users but are first allocated to roles, which are then assigned to users. This allows for more flexible and efficient management of user permissions
Administrators can create, edit, and delete roles, as well as view and modify information about users and user groups associated with roles. This ensures that only authorized users can access and operate specific functions.
Note: Due to the complexity of SavingsNow permissions, detailed role permissions configuration is conducted in the "Permissions Management" section.
Create a role
The role creation feature allows you to create new roles to assign a specific set of permissions and access levels to users.
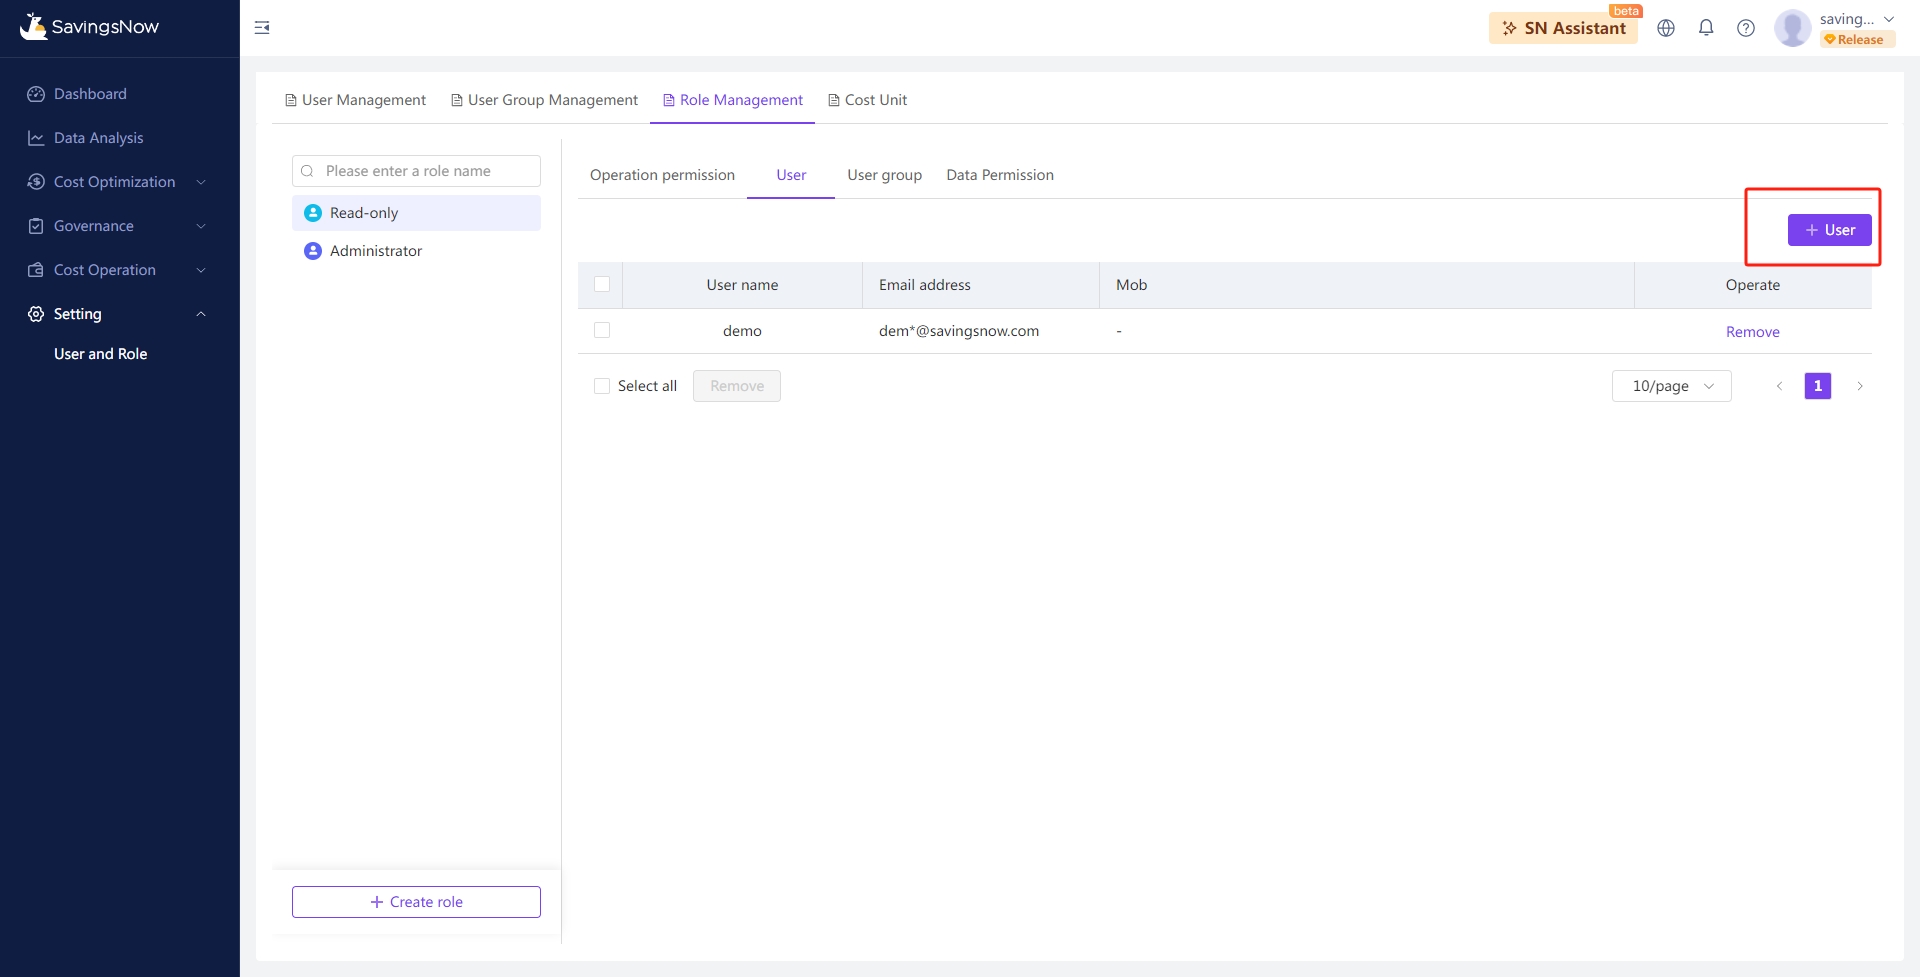
- In the "Role Management" Tab, click the [+ Create Role] button at the bottom of the left-hand list.

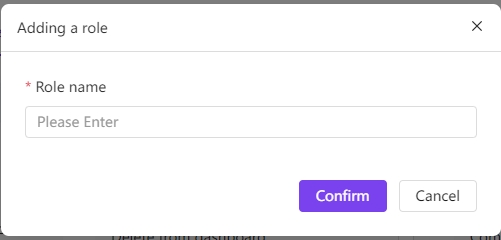
- Enter the name of the character in the pop-up window;
- Click [Confirm] to save the new role Settings; Otherwise, click [Cancel] if you want to cancel the current operation.

Edit roles
- In the "Role Management" tab, select a role from the left-hand list. Click the [Edit] icon.
- In the pop-up editing window, make necess changes, and click [Confirm] to save the updates.

Remove roles
The role deletion function allows administrators to permanently delete a role from the system. Use this feature cautiously, as deleted role data can not be restored.
- In the "Role Management" tab, select a role from the left-hand list. Click the [Delete] icon.
- Click [Confirm], the role will be permanently removed from the "Role List", but the associated users and user groups will not be deleted.

Add users to a role
The user addition feature allows you to add users to a specific role, assigning them the corresponding permissions and access levels.
- In the "Role Management" tab, select a role from the left-hand list. Click the [+ User] button above the user list on the right.

- In the pop-up "Add User" drawer, search and check the user you want to add.
- Click [Confirm] to save the changes.

Remove users from a role
The user removal feature allows you to remove specific users from a role, adjusting their permissions or access levels.
- In the "Role Management" Tab, select a role from the left-hand list. The user list on the right will display all users under that role.
- Select the removed user and click the [Remove] button in the action column; Click [Confirm] again to complete the changes, which will revoke the user's current role.

Add user groups to a role
Similar to adding users, the "Add User Group" feature allows you to assign specific roles directly to user groups for unified management of permissions.
- In the "Role Management" tab, select a role from the left-hand list. Click the [+ Groups] button above the groups list on the right.

- In the pop-up Add User Group" drawer, search and check the user group you want to add.
- Click [Confirm] to save the changes.

Remove user groups to a role
Similar to removing users, the "Remove User Group" feature allows you to remove specific user groups from a role, adjusting their assigned permissions or access levels.
- In the "Role Management" Tab, select a role from the left-hand list. The user group list on the right will display all users groups under that role.
- Select the removed user group and click the [Remove] button in the action column; Click [Confirm] again to complete the changes, which will revoke the user group's current role.
